
| CSC300: Set up your IntelliJ IDEA Project [5/5] |   |
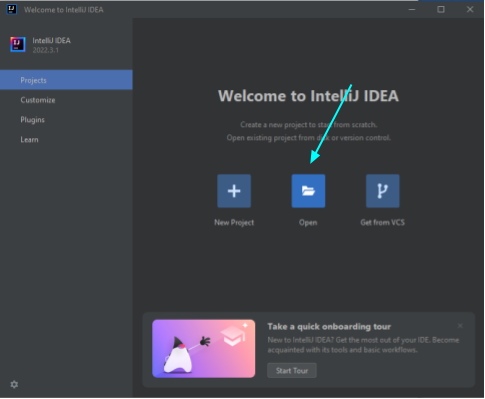
Start up IntelliJ IDEA. Click the Open tile.
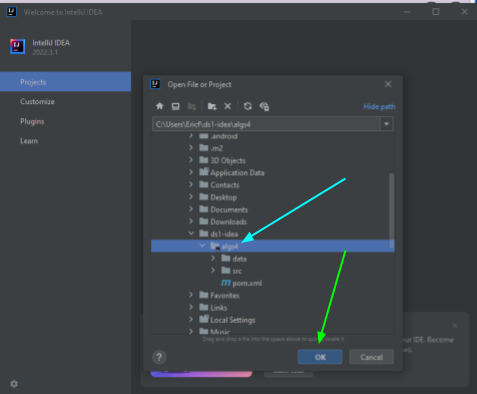
Navigate to the algs4 directory where you unzipped the course code archive and Click OK.
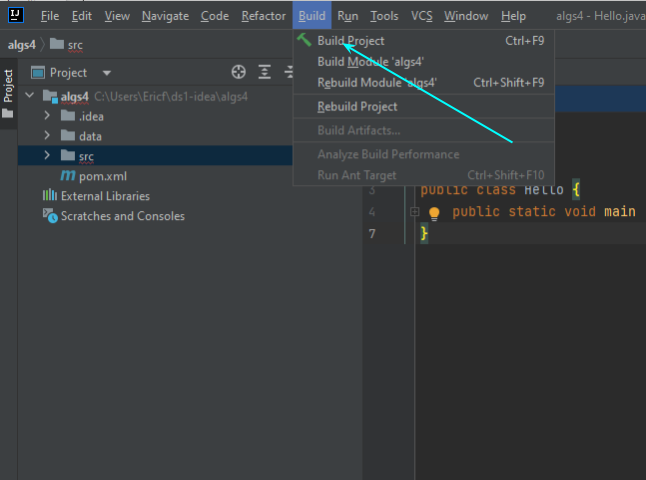
When the project opens, go to the Build menu and choose Build Project.
A message should pop up at the bottom of the IDEA application window telling you that The SDK is not specified for module algs4.
Click the Configure... link.

NB: The picture here is old. You should select Language Level 21.
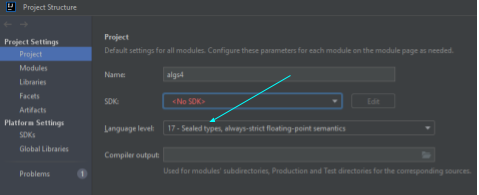
Add an SDK.
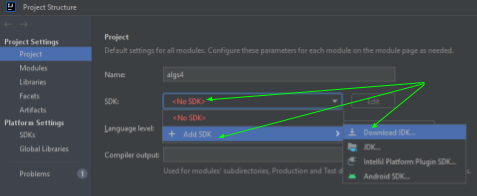
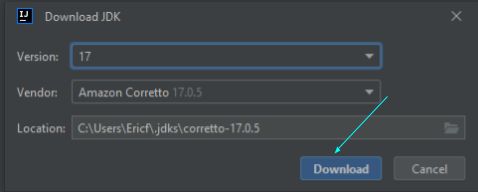
Select an SDK. Amazon Coretto 21.0.2 should be fine. Accept all the defaults in the dialog box. Click Download. The JDK will be installed for you. NB: The picture here is old, but you should choose JDK version 21!
Note that things may look slightly different if you use Linux or MacOS.
Email me with any questions.
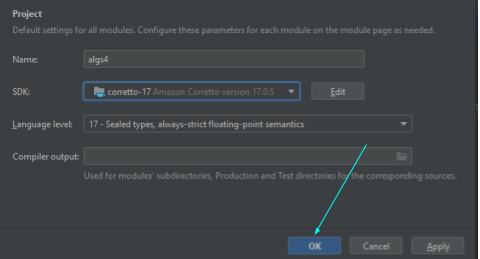
Click OK.
IntelliJ IDEA will set up your project. You can watch the progress (lower right-hand corner of the IntelliJ IDEA application window).
In the project pane on the left-hand side of IntelliJ IDEA, navigate to src/main/java/algs11 and select Hello.
Right click and select Run 'Hello.main()' in the context menu.
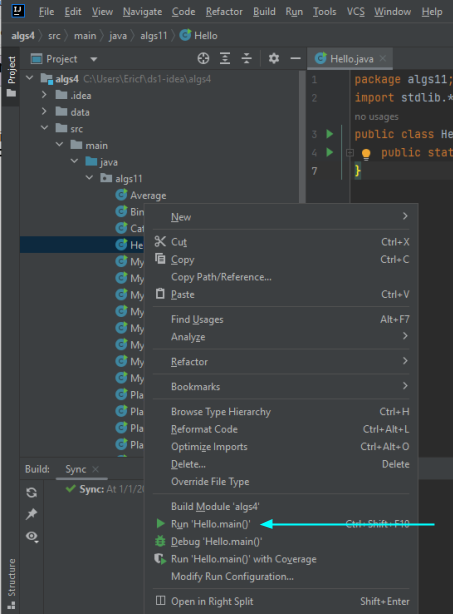
In the bottom third of the application window, in the Run area, you should see the program print Hello.
This indicates that you have successfully set up IntelliJ IDEA, Java, and the code for the course.
At this point, you have compiled and run your first Java program!

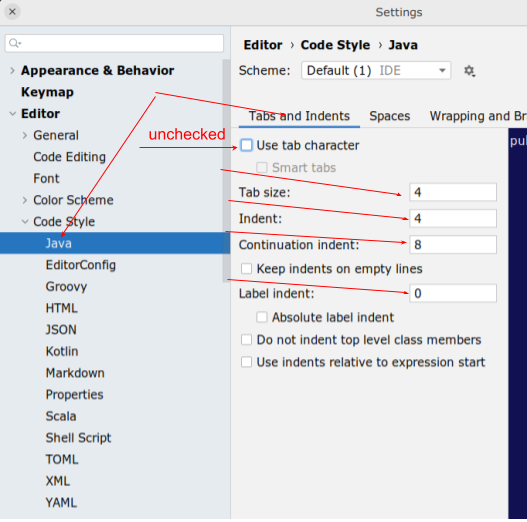
One final step: In IntelliJ IDEA go to File -> Settings (on Windows/Linux) or IntelliJ IDEA -> Settings (on a Mac) and change your tab settings as follows. This will help with code formatting when I look at your code. Pro tip: Most programmers I hang out with can't stand tabs! It's a pretty standard practice to use the tab key and have your editor replace tabs with spaces.
