

| CSC403: Set up your IntelliJ IDEA Project [5/5] | |
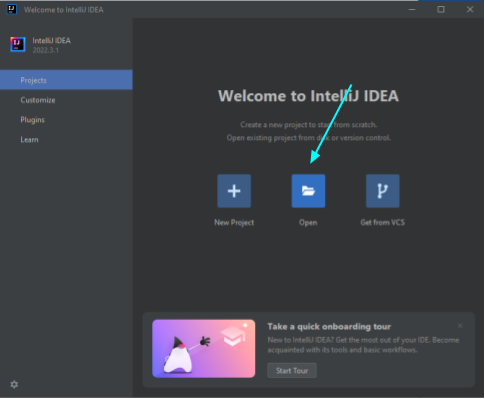
Start up IntelliJ IDEA. Click the Open tile.
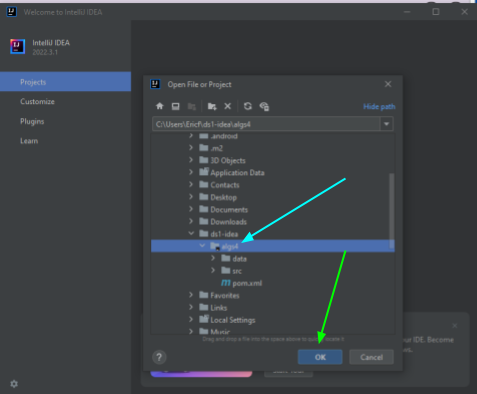
Navigate to the algs4 directory where you unzipped the course code archive and Click OK. The directory you select should be the one that contains the src directory and the pom.xml file.
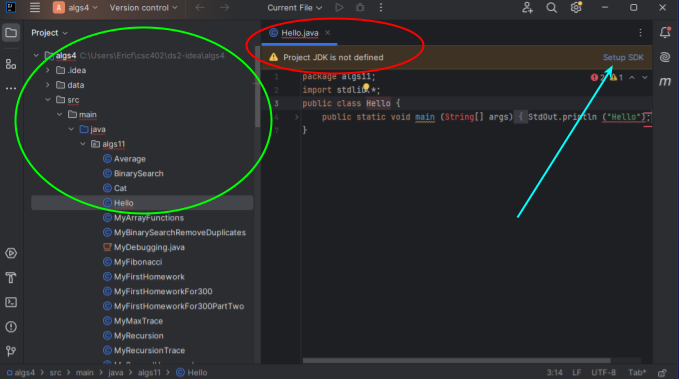
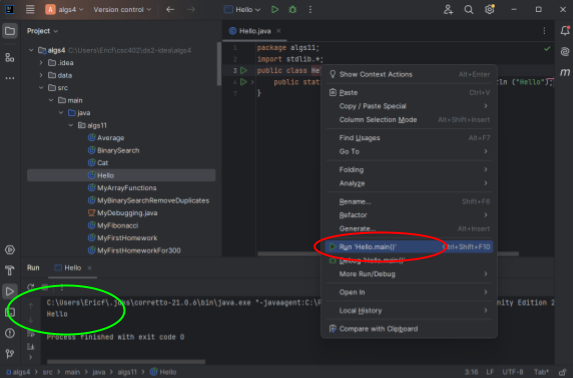
When the project opens, navigate to src/main/java/algs11 in the Project pane on the left. Open up Hello. There should be a message just under the filename in the center of the editing pane saying the Project SDK is not defined. Click Setup SDK on the right.
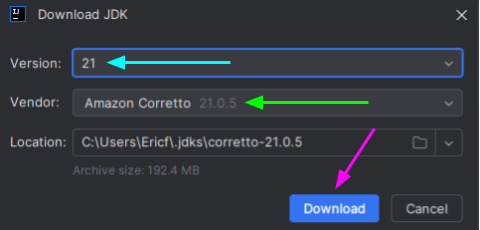
Click Download JDK.
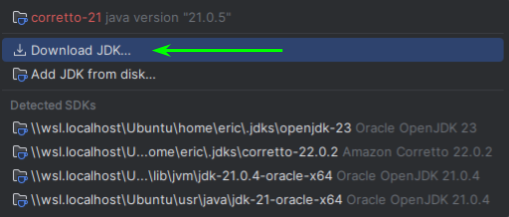
Select JDK Version 21 and Vendor Amazon Coretto 21.0.6. Click Download. The JDK will install. Note: The picture is slightly old; choose version 21.0.6.
Right-click the Hello class in the main editing window. Click Run Hello.main() in the context menu. You should see the Hello, world! output in the console window on the lower pane. If you get this far, you have successfully setup your programming environment.
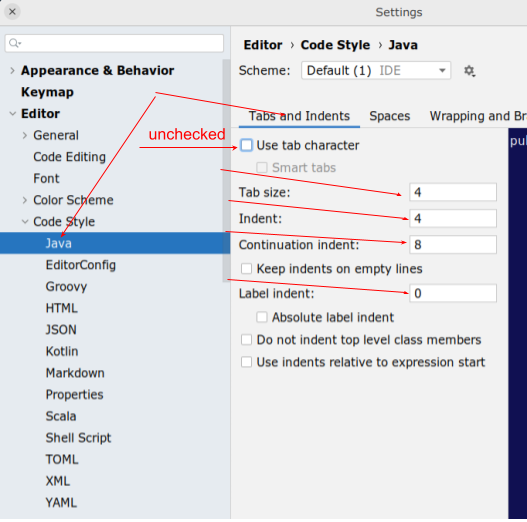
One final step: In IntelliJ IDEA go to the Hamburger menu on the top left and choose File -> Settings (on Windows/Linux) or IntelliJ IDEA -> Settings (on a Mac) and change your tab settings as follows. This will help with code formatting when I look at your code. Pro tip: Most programmers I hang out with can't stand tabs! It's a pretty standard practice to use the tab key and have your editor replace tabs with spaces.
If you have problems, send a message in the #general channel in the Discord server. Your classmates or I will help you.